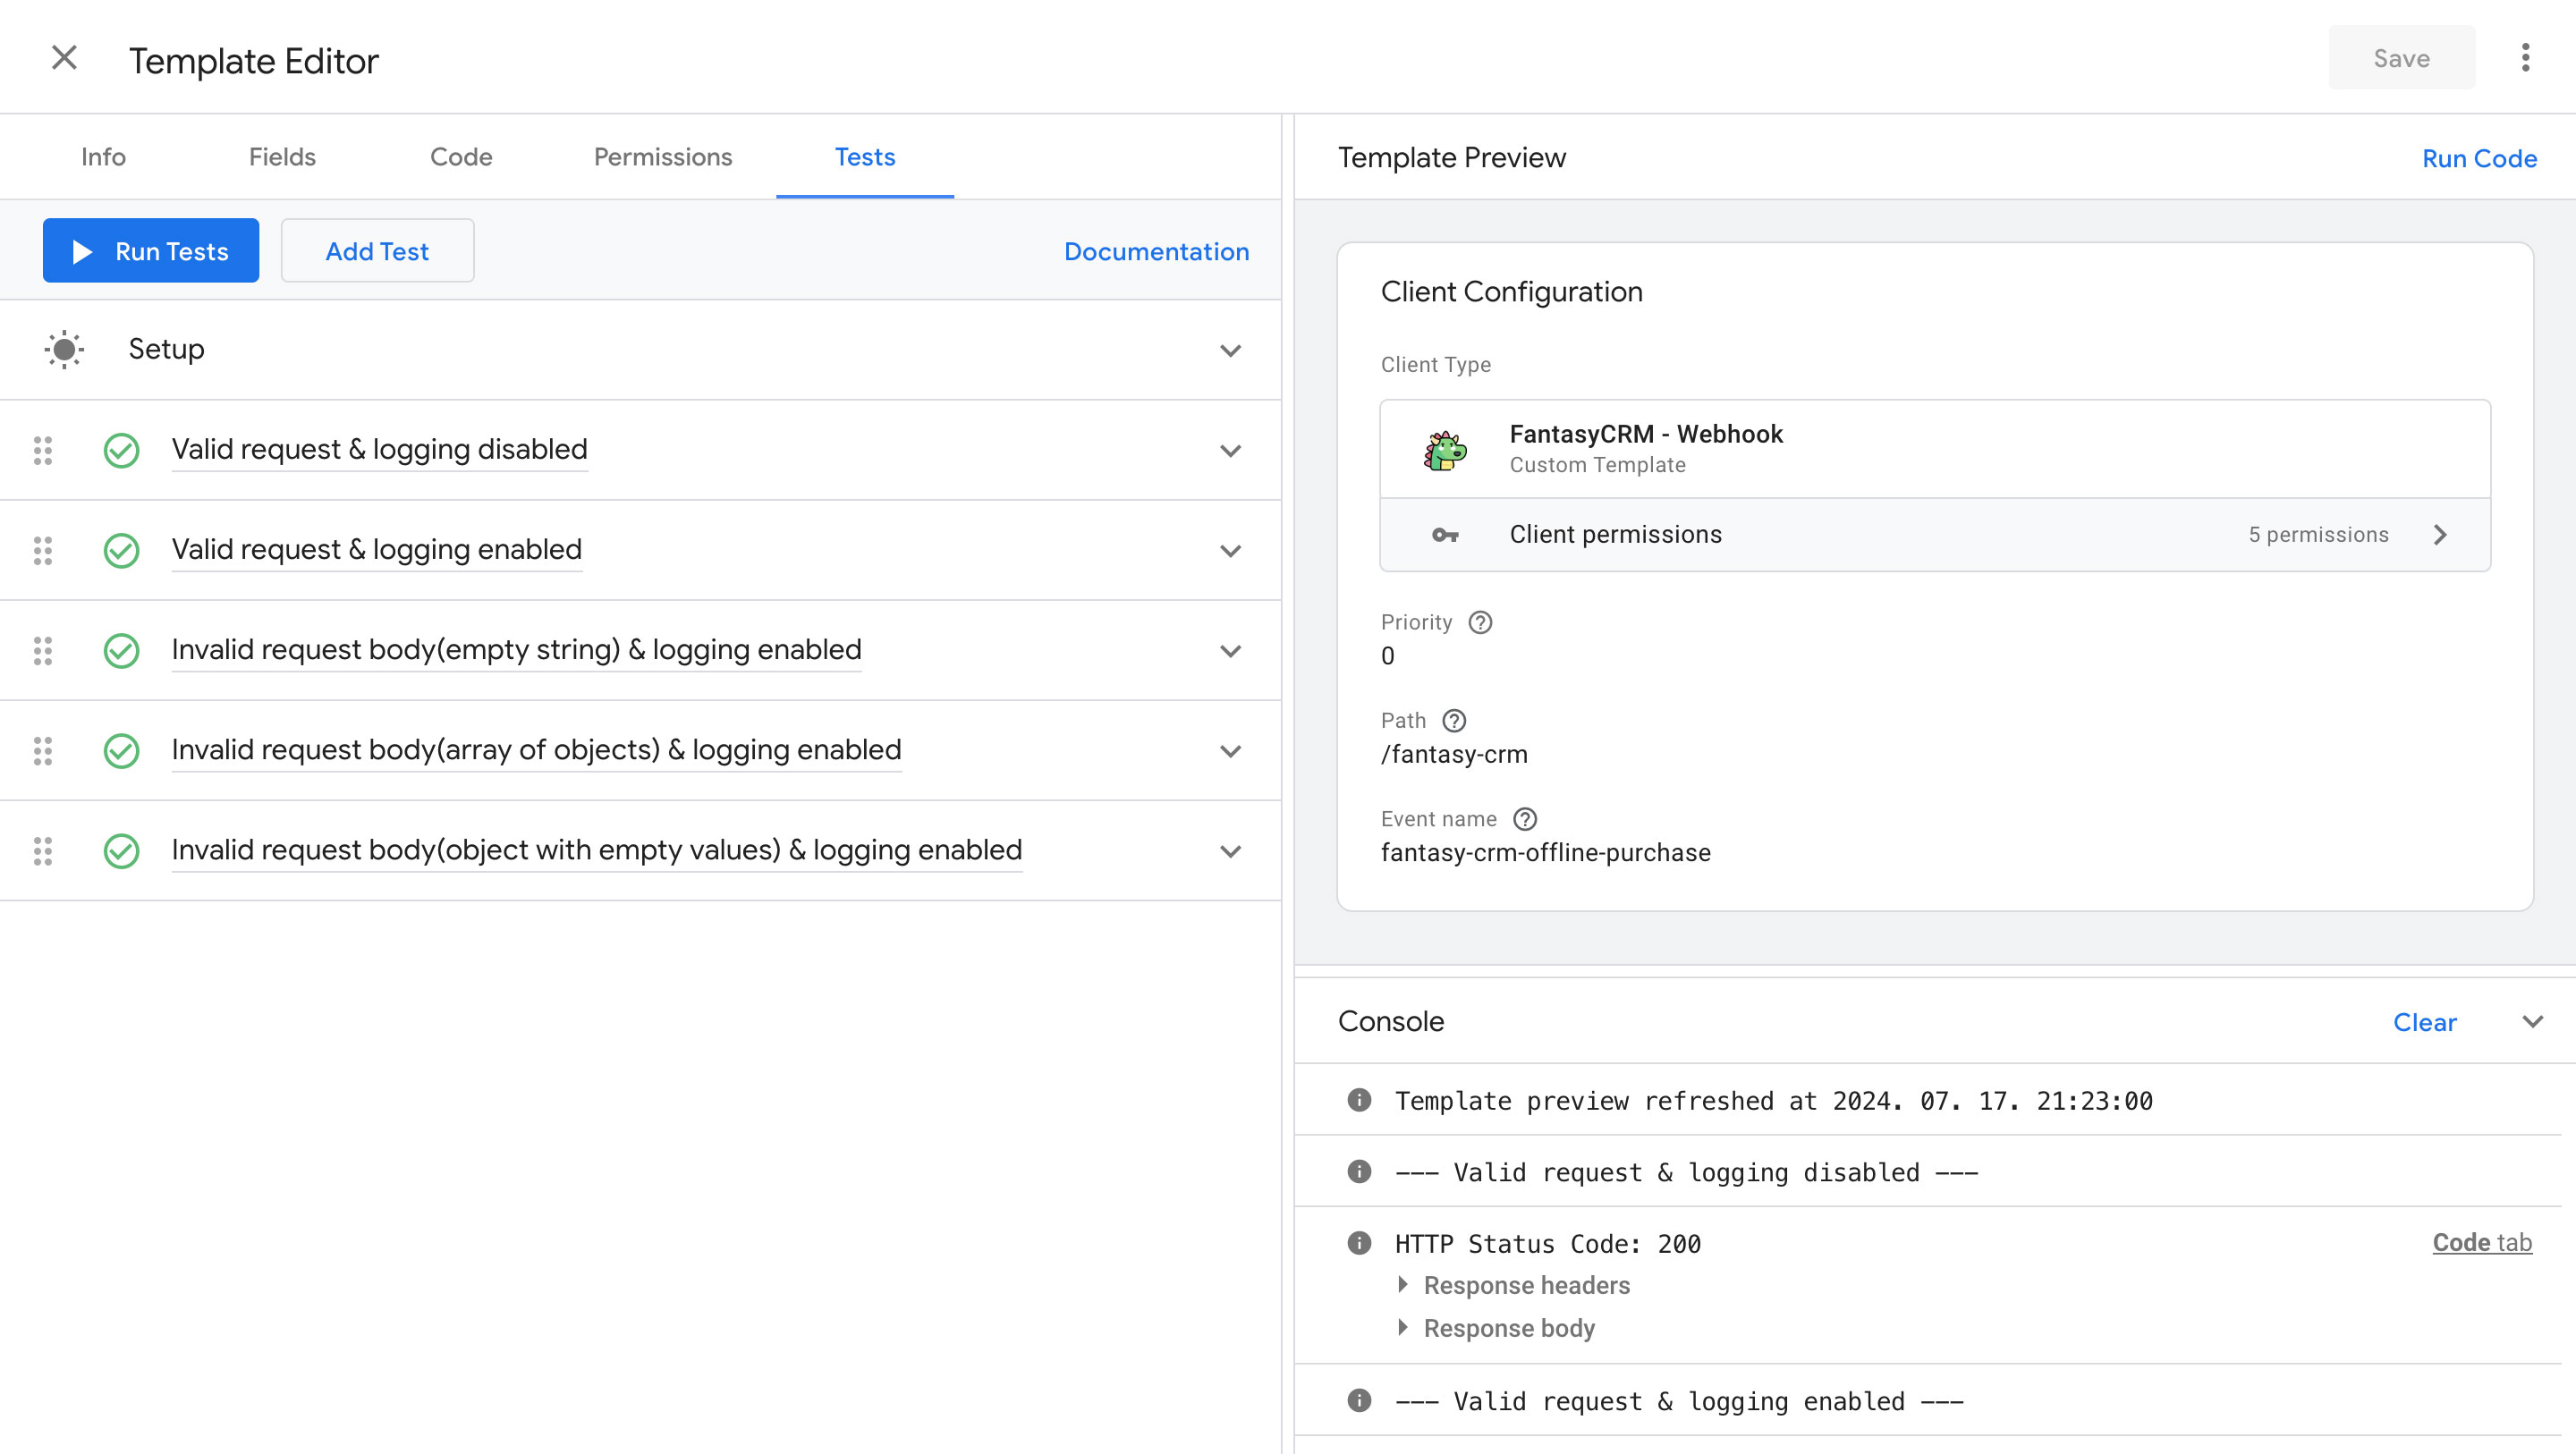
In this advanced level guide I’ll introduce how to create & run multiple Server-side GTM Unit Tests. I will share some practical tricks with examples on how to overcome unexpected challenges when your Custom Client Template Unit tests try to claim the request right after each other when we run them in batch. For the better understanding, I’ve wrapped the technical parts in a fictional business story.
If you’re not interested in the story nor the planning or custom client coding part jump right to the section on Testing: Unit Testing our Client Template.
Before we begin it’s important to know that I assume that you are already aware of how to create a custom template in Google Tag Manager and the Tests feature and the Tests user interface. That’s why I won’t cover some basic details in this article e.g. template data object, test setup, mocking data & functions, making assertions etc.
If you aren’t familiar with custom template creation process I recommend you to read Custom templates guides for Google Tag Manager from Simo Ahava or if you haven’t got any knowledge of the Tests feature or the anatomy of GTM Test I would recommend You to read Simo’s comprehensive article about GTM Unit testing.
Introduction: A fictional business story
Let’s imagine that we have a CRM called Fantasy CRM where we store online and offline data. The actual problem is that we don’t measure offline conversions.
So our primary goal is to transmit offline purchase data once, when sale actually happens and distribute(broadcast) it across different marketing platforms, e.g. Google Analytics, Google Ads, Facebook etc… to measure conversions.
There are some secondary goals also. Our solution should be tailored to the CRM as much as possible and must be able to log and handle errors.
Planing: High level components & dataflow
To reach our goal we came up with the following idea:
We will use the CRM’s webhook feature - as an alternative implementation of the Hollywood Principle “Don’t Call Us, We’ll Call You” - for sending CRM offline purchase data to the broadcast server and for broadcasting we will use server-side GTM.
The Big Picture
To easily understand system operations and the role of individual parts of our system, we’ve created a dataflow diagram aka. DFD.
This is a logical dataflow diagram. It displays the theoretical process of moving information through the system, like where the data comes from, where it goes, how it changes, and where it ends up.
DFD maps out the flow of information for our system:
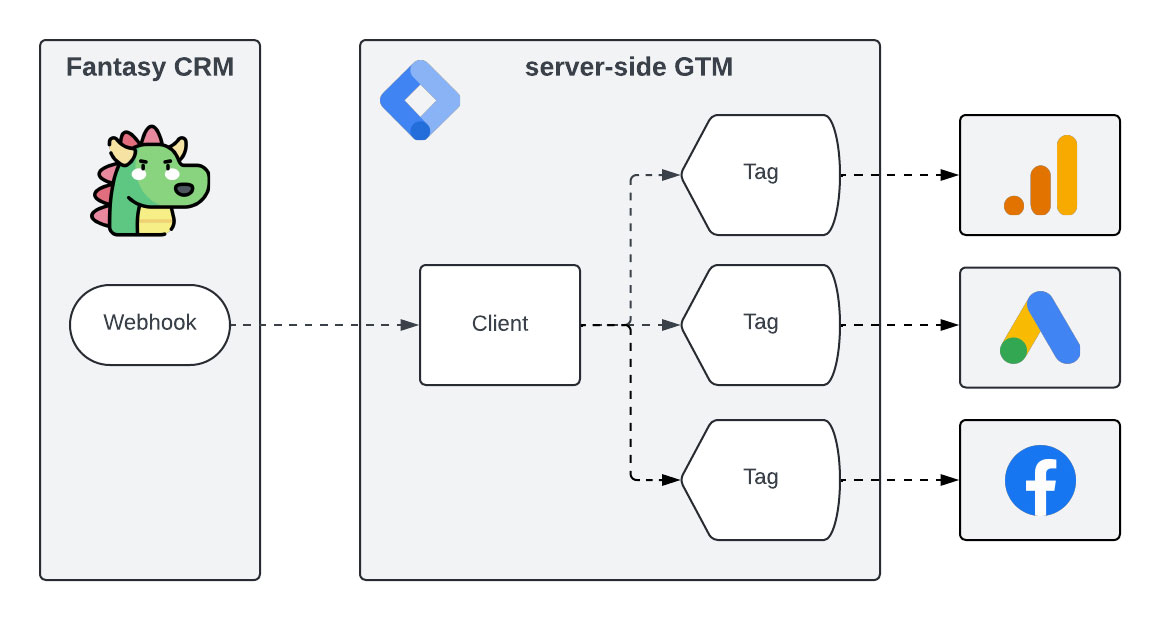
The dataflow components tasks are the following:
- Webhook: Initiate event-driven communication between 2 applications. In our case whenever an offline purchase occured the CRM will send a HTTP request to the server-side GTM end-point URL what we have registered before.
- Client: Listen for incoming HTTP requests, convert requests into event data, and respond to the requests. Once the Client processes the request, it makes data usable for tags and triggers in the server-side GTM container.
- Tag: Take the event data object, map it to the correct format, and dispatch it to external vendors via HTTP request.
- External vendors: Receive & process offline conversions event data.
Choosing the right sGTM parts
For the sGTM tags there are many ready-made solutions available to us as templates. Most of them are official or published & maintained by well-known, trusted creators. So we don’t have to invent the wheel again!
However in our fictional case there isn’t any official CRM-specific solution for the sGTM client that’s why we’ve decided to build a custom one on our own.
What else influenced our sGTM client decision?
To be perfectly honest, we can find a few generic 3rd-party HTTP request handler sGTM client templates on the Community Template Gallery, but(!) it is important to note that for quality & security reasons we should always prefer the official add-ons over third-party ones created by less-known authors. Even Google warns us about it: “Templates provided by third parties in the Google Tag Manager community template gallery are not provided by Google. Google makes no promises or obligations regarding the performance, quality, or content of the services and applications provided by the templates.” Long story short we should follow [OWASP principles][4] e.g. “Don’t trust services”.
Secondly, generic templates, by their very nature, sadly go completely against the [UNIX DOTADIW][5] - “Do one thing and do it well” - philosophy. That is why they often contain unwanted functions, which makes our final solution more complicated than it needs to be. In addition, it is also possible that at the end of the day we are faced with untested, bloated code. This makes the template itself unnecessarily complex and may cause unexpected side effects or behavior.
In summary, since there is no official sGTM client in our case that fits our needs - e.g. maximise the controll over the CRM’s webhook request handling - and we don’t want to run experiments with generic templates to see if they really meet our needs or not, and since we have to take full responsibility for the final product and want to mitigate security risks we create one ourselves.
So first we have to examine the CRM’s webhook request process and than we will create a custom sGTM client for request handling.
Understand CRM’s webhook request
Let’s remember! Whenever an offline purchase occured the CRM will send a HTTP request.
If there isn’t any detailed CRM webhook documentation we have to capture the request to be able to examine it. We can write a small app in Python or PHP for that, or use off-the-shelf tools like pipedream’s requestbin.
We’ve captured the request and found out that the request method is POST and an example for the body of the request is as follows:
{
    "id": "e45e3467-3e77-46f4-8504-7bfc42ebb17d",
    "email": "john.doe@sgtm.example.com",
    "revenue": 99.9
}
Here are some key things to note about the webhook request body:
- It’s in
JSONformat. That’s a good start! - It’s a simple key-value pair object not an array of objects so from the sGTM point of view it contains only one event.
- It does’t contain any Common event data parameters as keys e.g. event_name!
All of the above are important to know in advance for Custom sGTM Client development.
Now that we have organized the required information, we will continue with the implementation of our project.
Implementation: Creating a Client Template
Clients are adapters between the software running on an external device and our sGTM container.
The main purpose of a Client is to parse the incoming HTTP request and generate a standard Event Data object for sGTM tags to utilize. The results are sent back to the requester.
IMPORTANT! A single incoming HTTP request can be “claimed” by only one client. As soon as a client claims the request, no other client can be activated for that request anymore. We will come back to this in the Testing: Unit Testing our Client Template section.
To maximise the controll over the CRM’s webhook request handling in sGTM I’ve created a simple sGTM Custom Client Template.
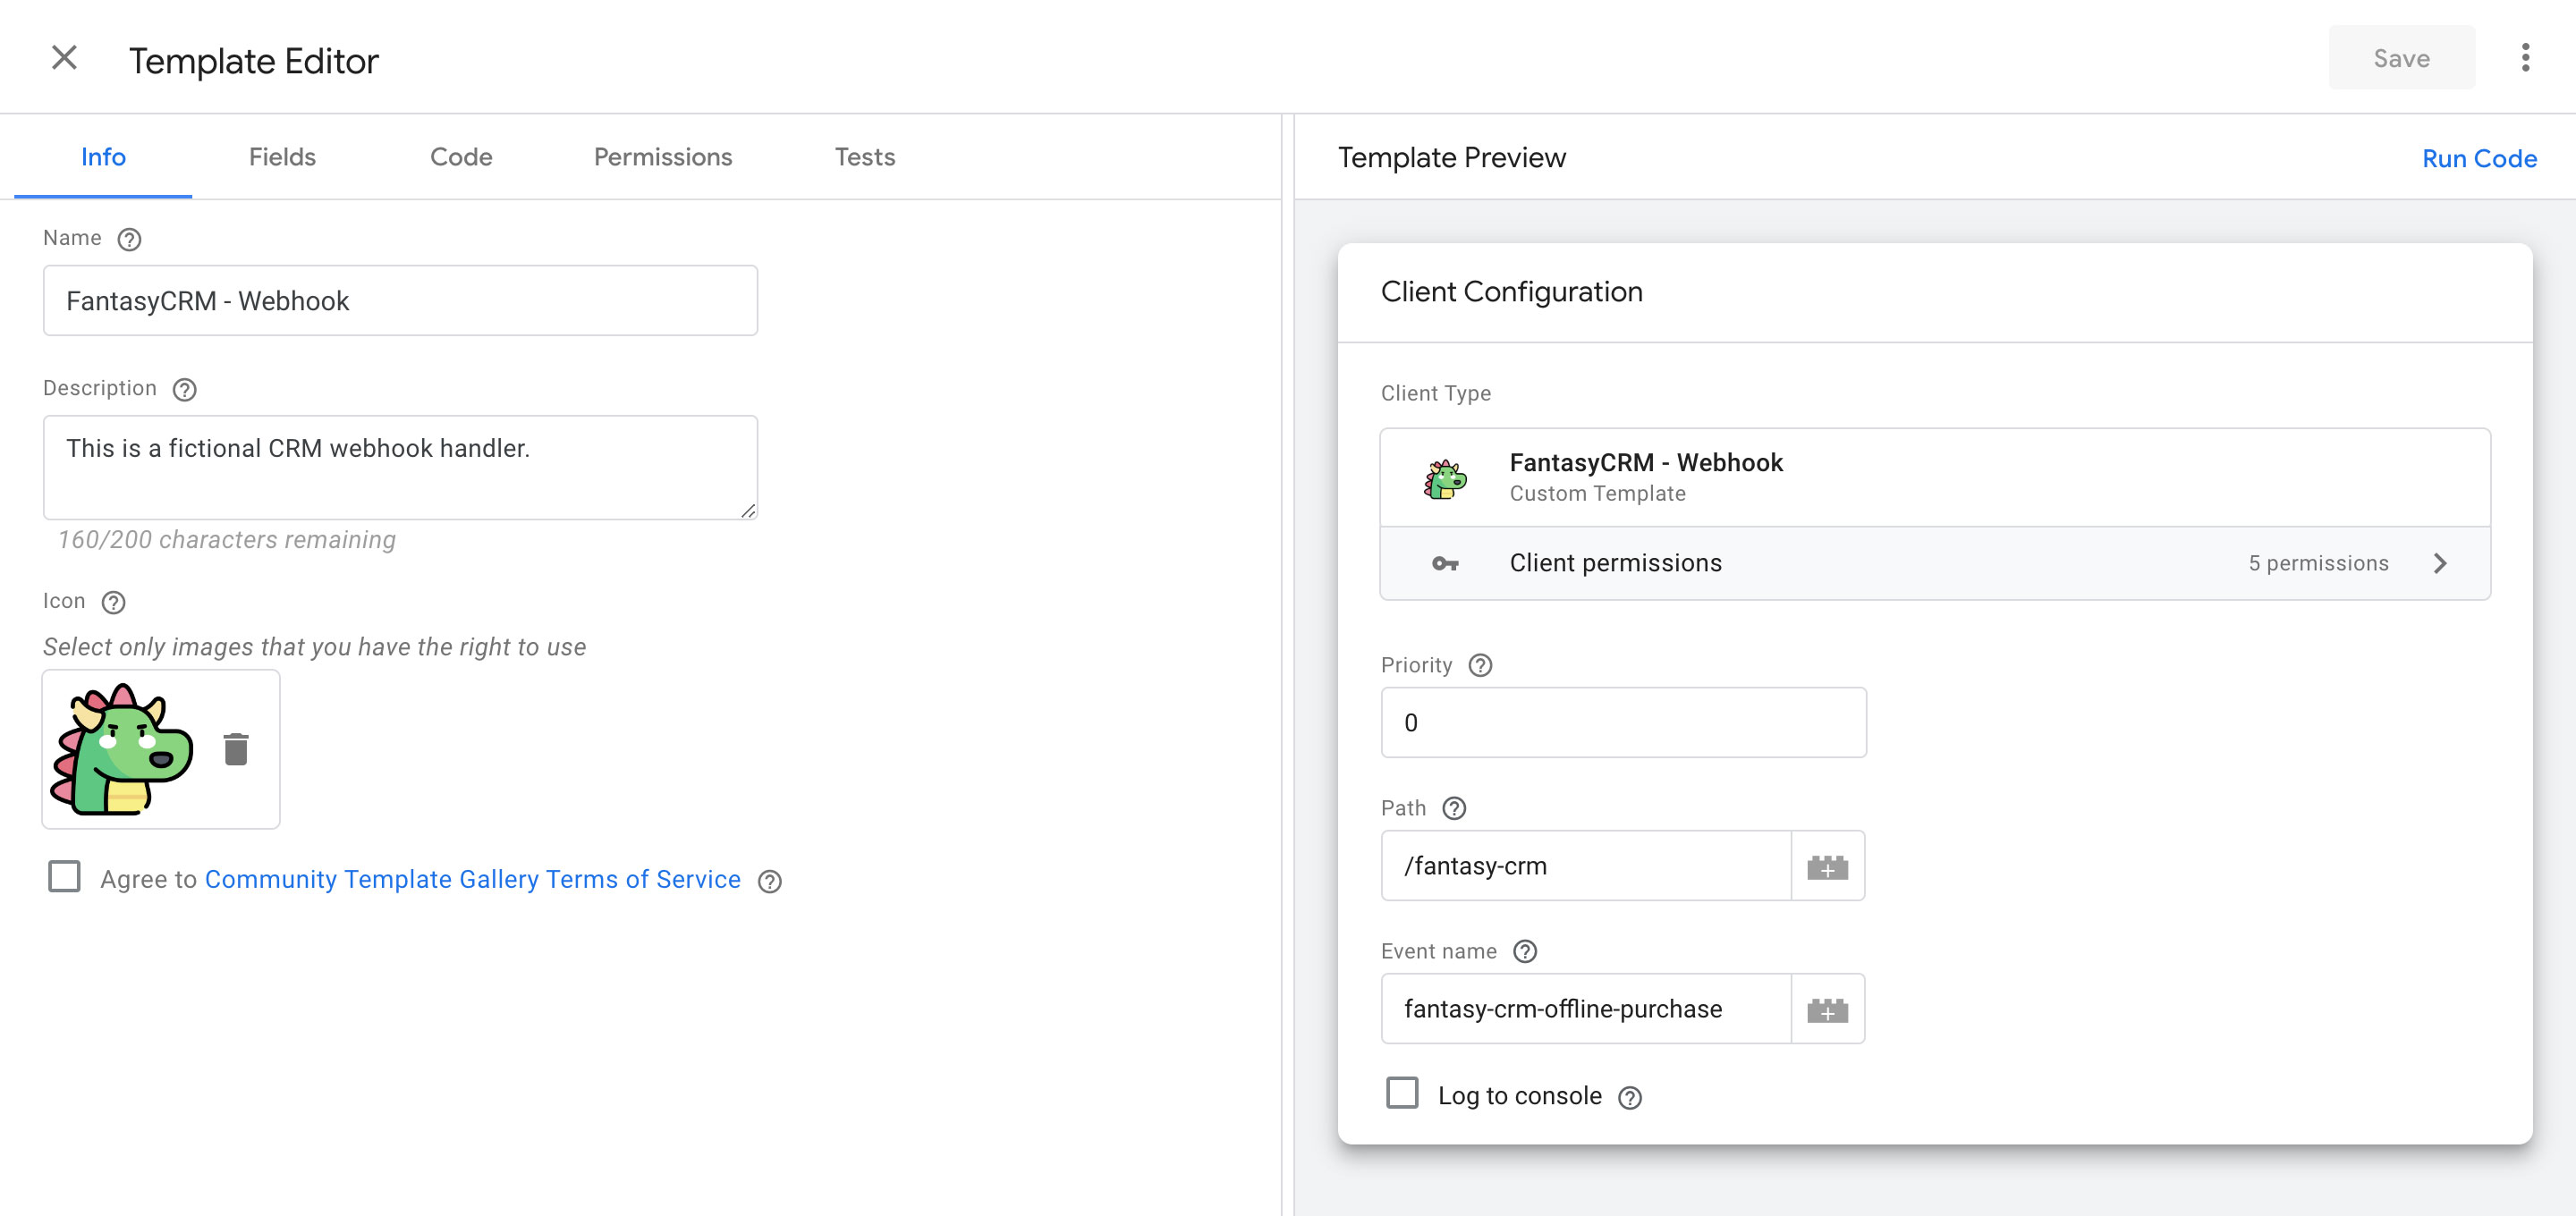
It’s for educational purposes only! The template is publicly available on github:
The code part
As I mentioned earlier, I won’t detail every step of the template creation process. I will just focus on the code part because this is the part that is heavily related to unit testing. Speaking about the code server container templates use only sandboxed JavaScript.
What is Sandboxed Javascript?
Sandboxed JavaScript is a simplified subset of the JavaScript language that runs in an isolated environment. This kind of simplicity and isolation is perfect for running & testing JavaScript code in a safely way without any unwanted side effects.
The downside is that we can’t use the full spectrum of JavaScript. For example there is no new keyword in GTM sandboxed JavaScript, and functions don’t have access to the this keyword. That’s why we can’t use OOP paradigm in sGTM templates.
If you would like to know more about what sandboxed JavaScript stands for I recommend you to read the [official Google documentation about the sandboxed JavaScript][10]
Let’s see the Custom Client Template code now!
// Include modules aka. sGTM APIs
const claimRequest = require('claimRequest');
const getRequestMethod = require('getRequestMethod');
const getRequestPath = require('getRequestPath');
const getRequestBody = require('getRequestBody');
const JSON = require('JSON');
const getType = require('getType');
const runContainer = require('runContainer');
const setResponseStatus = require('setResponseStatus');
const setResponseBody = require('setResponseBody');
const returnResponse = require('returnResponse');
const logToConsole = require('logToConsole');

// Decide whether logging is enabled
const log = data.loggingIsEnabled ? logToConsole : (() => { return undefined; });

// Do some basic logging for debuging purpose
log("Client template settings: ", data);
log("Request method: ", getRequestMethod());
log("Request body: ", getRequestBody());

// Decide whether the Client is allowed to claim the request
if (getRequestPath() === data.path && getRequestMethod() === 'POST') {

    // Claim the request
    claimRequest();

    // Convert HTTP request body to event object
    const parsedRequestBody = JSON.parse(getRequestBody());

    // Do some very basic validation
    let requestBodyIsValid = true;
    if (getType(parsedRequestBody) !== 'object') { requestBodyIsValid = false; }
    if (!parsedRequestBody.id) { requestBodyIsValid = false; }
    if (!parsedRequestBody.email) { requestBodyIsValid = false; }
    if (!parsedRequestBody.revenue) { requestBodyIsValid = false; }

    // Decide whether the request body is valid
    if (requestBodyIsValid) {
        // Create the event object for the container
        const event = parsedRequestBody;
        event.event_name = data.eventName;
        // Run the container with the event & return response
        runContainer(event, () => returnResponse());
    } else {
        // Create an error message
        const errorMessage = "Invalid request payload";
        // Log error
        log(errorMessage);
        // Send error response
        setResponseStatus(422);
        setResponseBody(errorMessage);
        returnResponse();
    }

}
The comments should help you understand how the code works, but to make it even clearer let’s look at it part by part:
1.) Include modules aka. sGTM APIs
The very first step is to require() the necessary APIs(functions) to be able to use them in the template code.
const claimRequest = require('claimRequest');
const getRequestMethod = require('getRequestMethod');
const getRequestPath = require('getRequestPath');
// etc.
You could find more information about the available APIs on the Google Developers platform.
2.) Decide whether logging is enabled
We’ve created our own log function named log(). The reason for that is we want to add a feature to control logging. So the logic depends on the actual template UI settings configured by the end-user: If logging is enabled in the template options the script calls logToConsole() otherwise it calls an empty function and nothing will be logged.
const log = data.loggingIsEnabled ? logToConsole : (() => { return undefined; });
3.) Do some basic logging for debuging purpose
Only for debuging purpose we log() some basic details: First our actual template settings. Secondly we log the HTTP request path, method and body.
log("Client template settings: ", data);
log("Request method: ", getRequestMethod());
log("Request body: ", getRequestBody());
4.) Decide whether the Client is allowed to claim the request
Depending on the template UI path setting i.e. data.path and the HTTP request method i.e. getRequestMethod() values the script decide whether the client should claim the request or not.
if (getRequestPath() === data.path && getRequestMethod() === 'POST')
5.) Claim the request
If the client should handle the request we call the call the claimRequest().
claimRequest();
IMPORTANT! As the official Google documentation outlines we should call the
claimRequest()to capture the request in the Custom Client Template code before we call therunContainer()API.
6.) Convert HTTP request body to event object
We parse the request body string with JSON.parse() to an object.
const parsedRequestBody = JSON.parse(getRequestBody());
7.) Do some very basic validation
We do a very basic validation: We use requestBodyIsValid variable as a flag. First we set it’s value to true and after that we start to validate the body step-by-step. If any validation fails we set the requestBodyIsValid value to false. That’s all!
let requestBodyIsValid = true;
if (getType(parsedRequestBody) !== 'object') { requestBodyIsValid = false; }
if (!parsedRequestBody.id) { requestBodyIsValid = false; }
if (!parsedRequestBody.email) { requestBodyIsValid = false; }
if (!parsedRequestBody.revenue) { requestBodyIsValid = false; }
The actual snippet goes against the DRY principle, so it cries out for re-factoring!
Why incoming data validation is important?
We should check for expected format, type, etc., to identify and prevent errors, inconsistencies, and fraud.
Of course, a much more complex check should be carried out, but for the sake of simplicity, we only check basic things now.
I will go into more depth about HTTP request testing & validation in a future article. Stay tuned!
8.) Decide whether the request body is valid
Depending on the requestBodyIsValid variable value the script decide whether to continue the request processing or not.
if (requestBodyIsValid) {
    // Validation passed
} else {
    // Validation failed
}
9.a.) Request body is valid
If the body of the request has passed the validation, the request processing continues in 2 main steps:
- We create the event object and we add the event name to it.
const event = parsedRequestBody;
event.event_name = data.eventName;
The data.eventName receives value from from the template UI settings.
- We start the container, passing the previously created event object to it.
runContainer(event, () => returnResponse());
In this case the container will return 200 OK status to the requester as a response. You could find more information about the runContainer() API on the related official Google Developers page.
9.b.) Request body is invalid
If the body of the request has failed the validation, the request processing continues in 3 main steps:
- Create an error message
const errorMessage = "Invalid request payload";
- Log the error
log(errorMessage);
- Send error response
setResponseStatus(422);
setResponseBody(errorMessage);
returnResponse();
A 422 Unprocessable Entity HTTP status code is used when a server understands the content type of a request, but the content is invalid.
Testing: Unit Testing our Client Template
Unit tests for Google Tag Manager custom templates help you validate the functionality of your code.
What exactly is a unit test?
Below is a simplified version of the testing pyramid from the opening keynote of the 2014 Google Test Automation Conference:
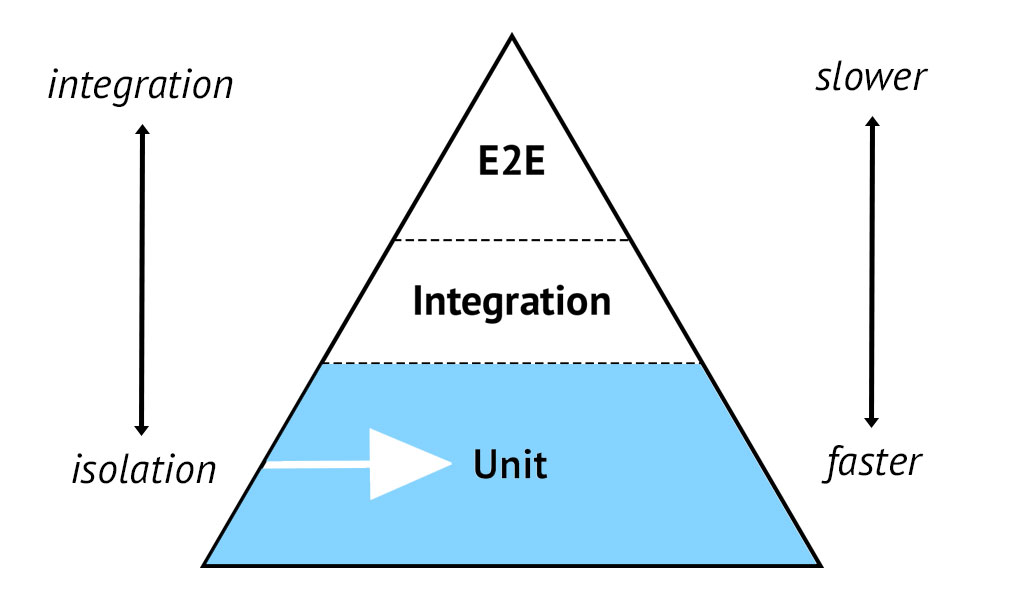
It’s a great visual metaphor telling you to think about different layers of testing. Unit tests form the foundation of this pyramid.
In testing unit represents the smallest testable part of the code.
What qualifies as a
unitin GTM context differs from traditional programming. In standard codebases, a unit is often a single function or class. In GTM Custom Templates, however, tests are executed at the template level. You don’t directly invoke internal helper functions in isolation. Instead, you execute the template’s code via the runCode API and validate its behavior using different mocked inputs and API expectations.
Unit tests sit at the bottom because they are simple, fast, numerous, and run in strict isolation. Unlike complex ones like integration or end-to-end tests, which may require real HTTP requests, external servers. Unit tests operate entirely with mocks, never actually touching the network.
Unit tests do have one major disadvantage: even if the units work well in isolation, you do not know if they work well together. But even then, you do not necessarily need end-to-end tests. For that, you can use an integration test. An integration test takes a small group of units, often two units, and tests their behavior as a whole, verifying that they coherently work together.
Useful articles: Testing pyramid The practical test pyramid
Setup
The GTM template editor has a dedicated Setup tab. This is the place where we write code that runs before every test in our test suite. It’s the perfect spot to put shared mocks that apply across all of our tests, so we don’t have to repeat the same setup code over and over in each individual test.
Think of it as the
beforeEachblock in a traditional testing framework — a single place to prepare the common ground that every test depends on.
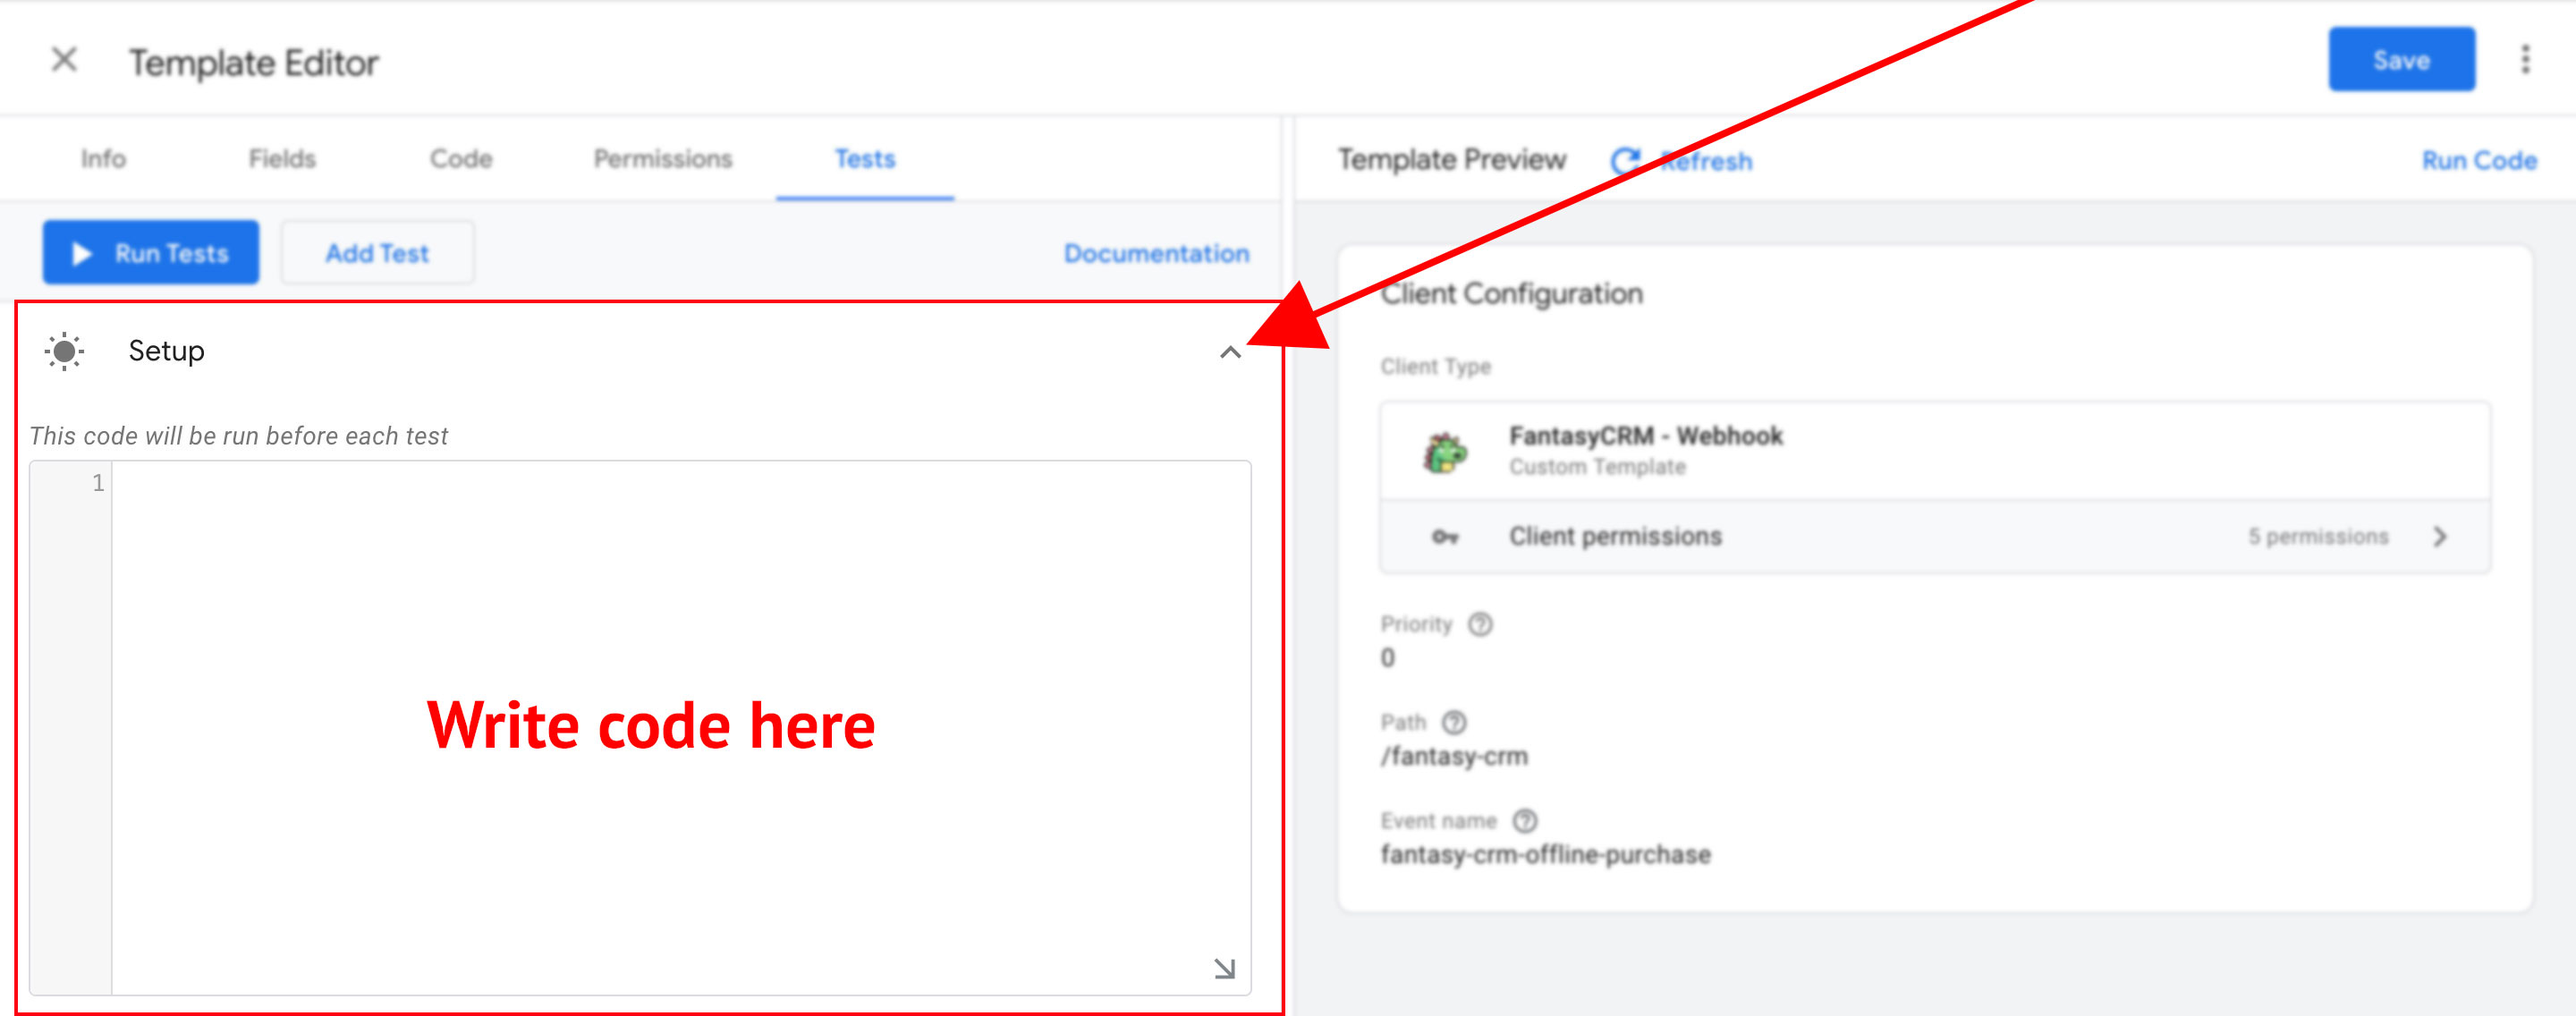
We’ll start with a few lines of setup code:
// Imports
const json = require('JSON');

// Mocks
mock('getRequestPath', '/fantasy-crm-webhook');
mock('getRequestMethod', 'POST');
Let’s go through it part by part:
1.) Import JSON
We start by requiring the JSON module since we’ll need it in our individual tests to stringify the mock request body.
const json = require('JSON');
2.) Mock getRequestPath()
We mock the getRequestPath() API to always return our expected webhook path. Since we put this in the Setup tab, every test will assume that the request is coming to the correct endpoint path.
mock('getRequestPath', '/fantasy-crm-webhook');
3.) Mock getRequestMethod()
Similarly, we mock getRequestMethod() to always return 'POST'. Again, this eliminates the need to repeat it in each individual test.
mock('getRequestMethod', 'POST');
Tests
While the Setup tab holds shared code that runs before every test, each individual Test tab represents a single, focused test case. This is where we define test-specific mocks, execute the template code via runCode(), and verify the expected behavior using assertions.
To put it simply: Setup is the shared foundation, Test is the actual scenario. Setup runs once before each Test. Tests run independently, one by one, or all at once in batch.
Each test follows the same three-step structure:
- Mock — define the test-specific inputs and API return values
- Run — execute the template code with
runCode(mockData) - Assert — verify that the expected APIs were called or not called
Code example:
// Mock
const mockData = {
  "path": '/fantasy-crm-webhook',
  "eventName": 'fantasy-crm-offline-purchase',
  "loggingIsEnabled": false
};
const mockEvent = {
  "id": "e45e3467-3e77-46f4-8504-7bfc42ebb17d",
  "email": "john.doe@sgtm.example.com",
  "revenue": 99.9
};
mock('getRequestBody', json.stringify(mockEvent));

// Call runCode to run the template's code.
runCode(mockData);

// Make assertions.
assertApi('runContainer').wasCalled();
assertApi('logToConsole').wasNotCalled();
Concurrency problem
When we try to run multiple test we are facing with an weird issue.
I’ve created a video about it:
If we run our client tests separatelly everything is fine but if we run them in batch only the first test passed all other failed.
The root cause is that the GTM test runner shares a single simulated request context across all tests in a batch. So when the first test calls claimRequest(), the request is marked as claimed — and every subsequent test that tries to claim it triggers the exception. So once a request is claimed sGTM doesn’t run any additional clients.
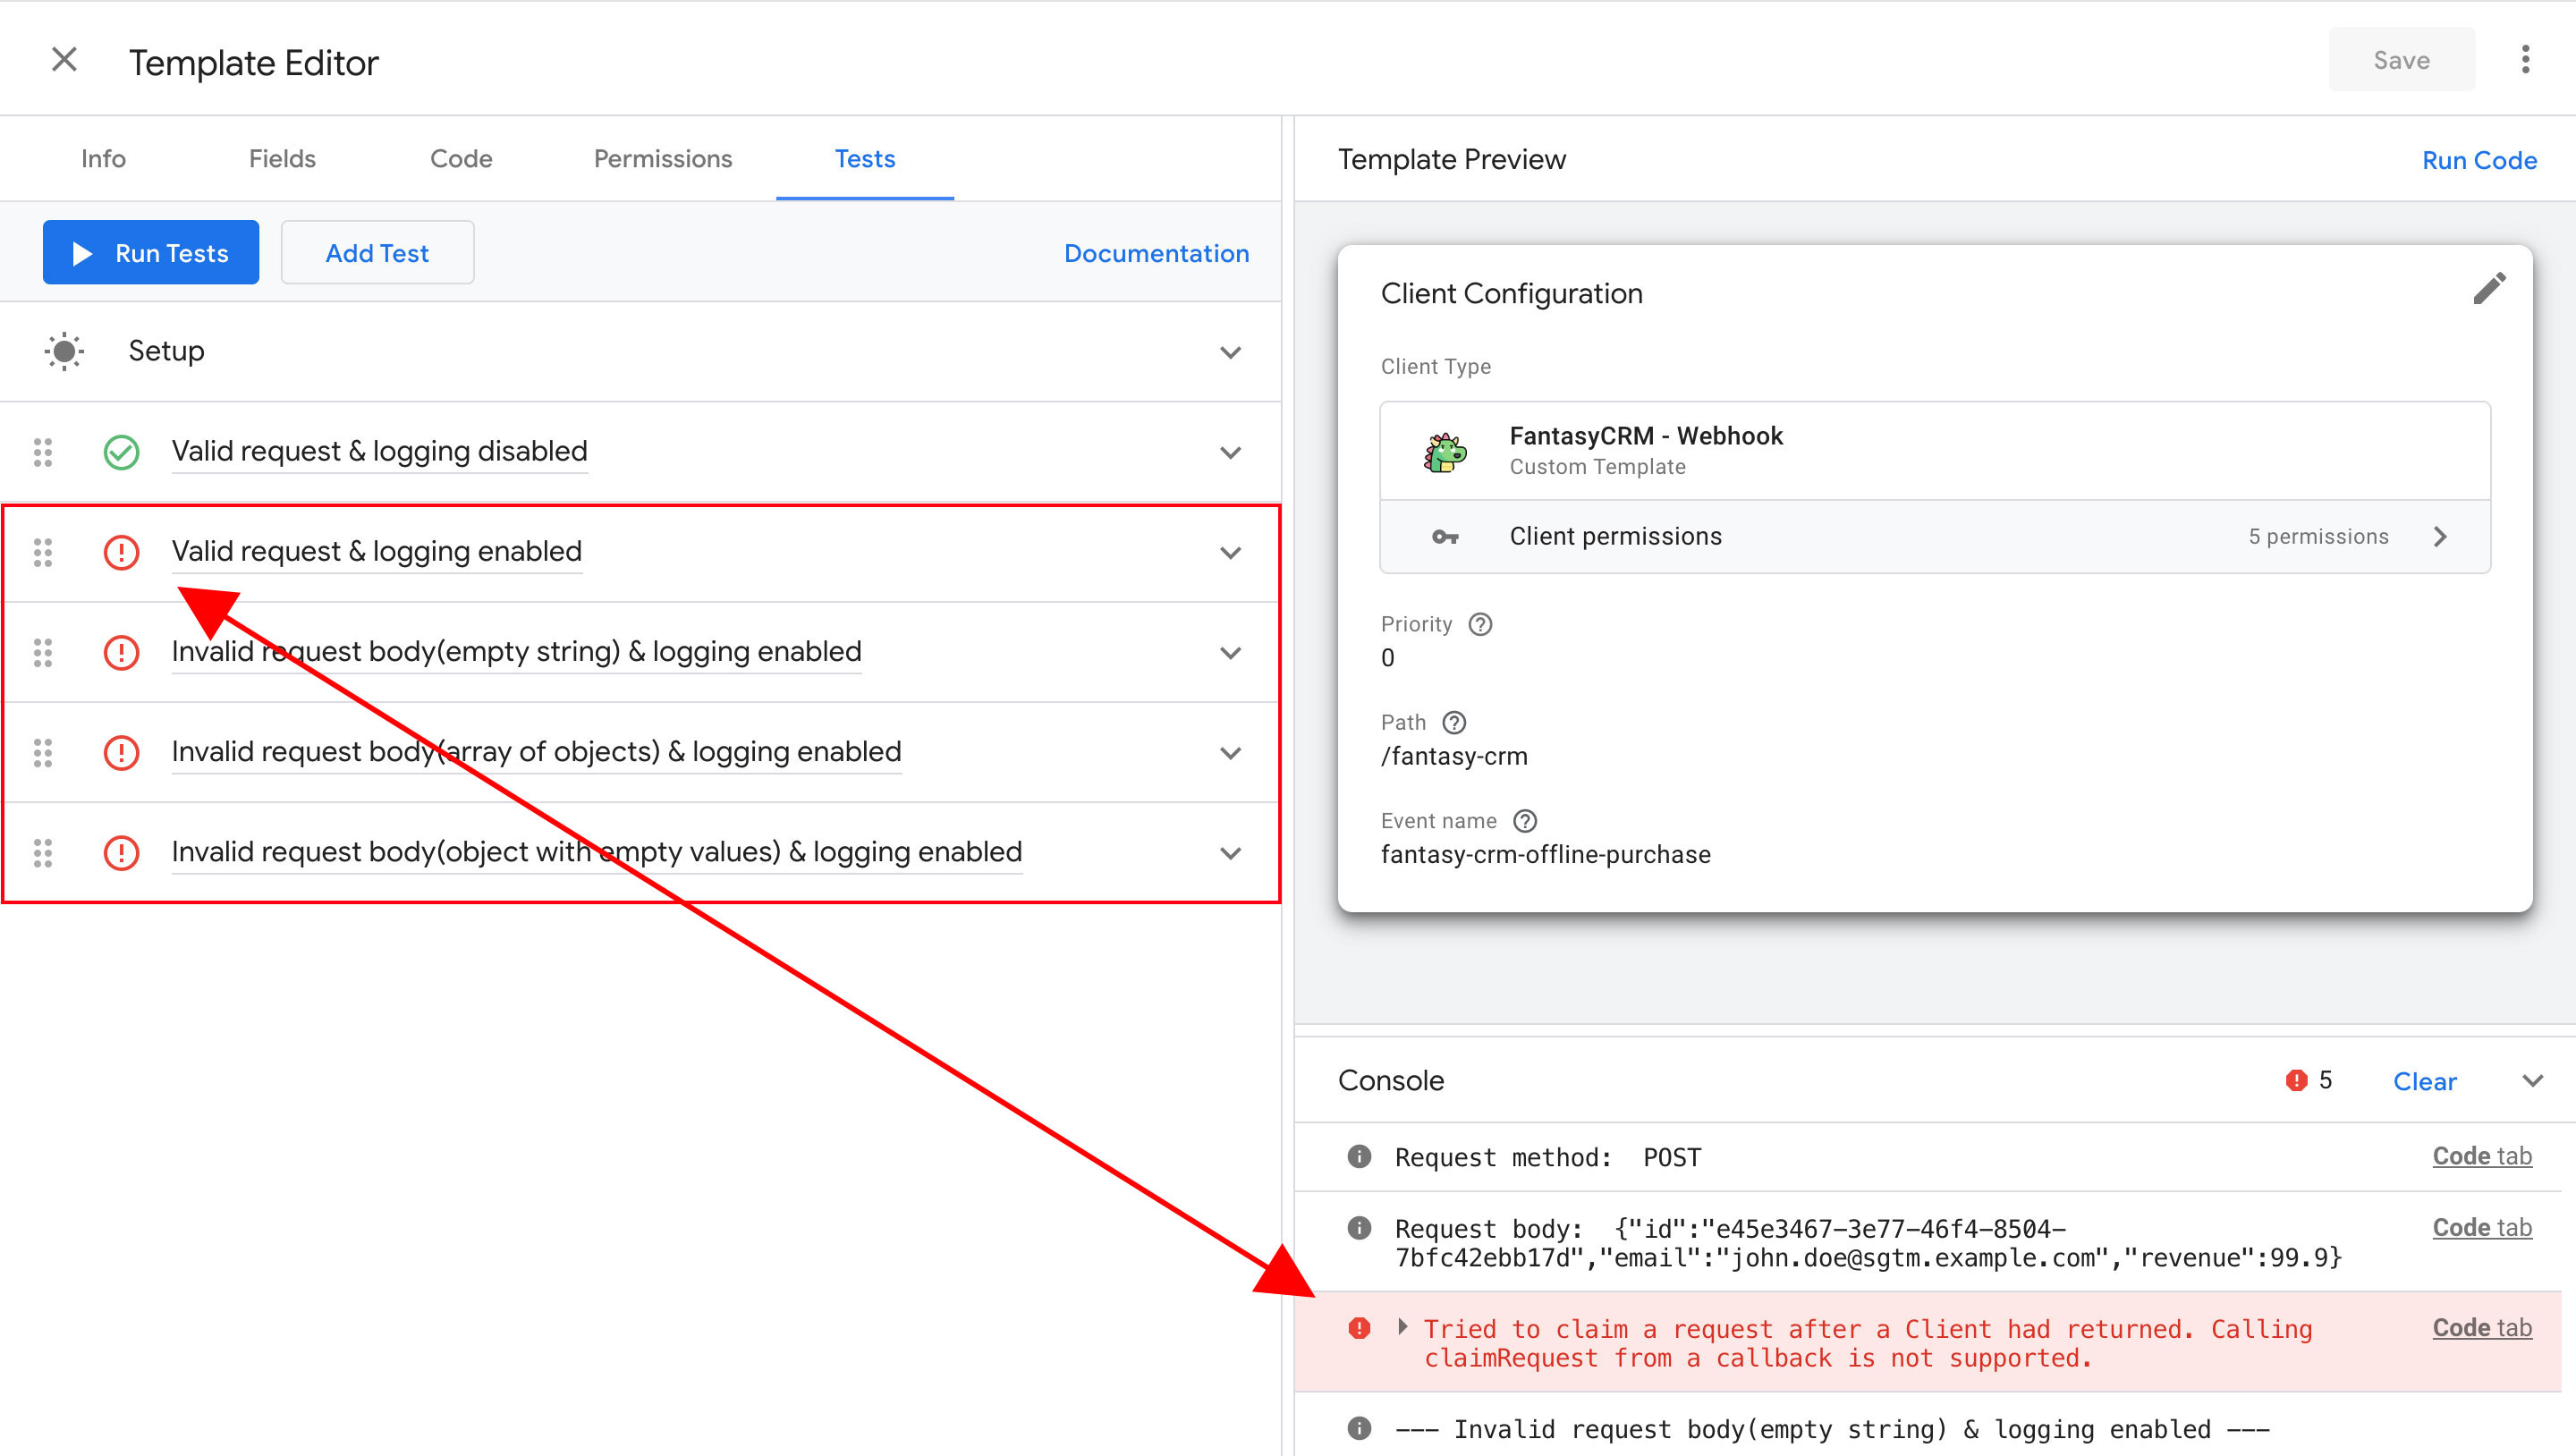
The claimRequest API throws an exception if called after the client returns.

You could find more details about the exception in the official Google documentation here.
Solving the concurrency problem
Mocking is a technique in software testing where we replace a real dependency with a controlled substitute — a “mock” — that simulates the behavior of the original. Instead of calling a real function that does real work, we instruct the test to return a value we control.
This lets us test our template code in strict isolation, without relying on real network calls, external systems or side effects.
In GTM template tests, mocking is not optional — it’s mandatory. We simply can’t make real HTTP requests during a unit test. The
mock()API is how we feed our template code controlled inputs and intercept API calls so we can assert on them.
We have to change our setup code for mocking:
// Imports
const json = require('JSON');

// Mocks
mock('getRequestPath', '/fantasy-crm-webhook');
mock('getRequestMethod', 'POST');

// Change no.1.: Mock the claimRequest API
mock('claimRequest', function () {});

// Change no.2.: Mock the runContainer API
let containerCallback;
let containerEvent;
mock('runContainer', (e, cb) => {
  containerEvent = e;
  containerCallback = cb;
  cb();
});
Let’s look at both changes:
Change no.1: Mock claimRequest()
The claimRequest() API is designed to be called only once per incoming request. When we run multiple tests in batch, each test tries to invoke it — causing the exception we saw earlier. By mocking claimRequest() with an empty function we prevent the real API from firing, so every test can independently simulate claiming the request without interfering with the others.
mock('claimRequest', function () {});
Change no.2: Mock runContainer()
The runContainer() API is asynchronous by nature. Mocking it allows us to capture the event object and the callback that our template passes to it, so we can inspect and assert on them in individual tests. We also immediately invoke cb() to simulate the container completing its execution.
mock('runContainer', (e, cb) => {
  containerEvent = e;
  containerCallback = cb;
  cb();
});
By storing the event and callback in the containerEvent and containerCallback variables we make them accessible to our test assertions. This way we can verify that our client is passing the correct event data to the container.
Testing the sad path
Not every request is valid — and our client handles that explicitly. This test covers the “Invalid request body (empty string) & logging enabled” scenario: when the request body is empty, the client should reject it with a 422 response and log the error.
// Mock
const mockData = {
  "path": '/fantasy-crm-webhook',
  "eventName": 'fantasy-crm-offline-purchase',
  "loggingIsEnabled": true
};
const mockEvent = "";
mock('getRequestBody', json.stringify(mockEvent));

// Call runCode to run the template's code.
runCode(mockData);

// Make assertions.
assertApi('setResponseStatus').wasCalledWith(422);
Notice that loggingIsEnabled is set to true here — so we can also assert that logToConsole was called, verifying that error logging behaves correctly in the invalid path. This is exactly the kind of edge case that’s easy to miss without a dedicated test.
Why does the client respond with 422 and not 400?
422 Unprocessable Entity HTTP status code signals that the server understood the request format (so it’s not a 400 Bad Request), but the actual content of the request body failed semantic validation — in our case a missing or malformed field. It’s a more precise and descriptive response than a generic 400, which makes debugging much easier for whoever is sending the request.Summary
Think of unit tests as your code’s safety belt.
As your logic evolves, these tests ensure that new changes don’t break existing functionality. They give you the confidence to refactor and improve your code, knowing that if you make a mistake, the tests will catch it before it reaches a live container.
Unit testing is often treated as an afterthought in Tag Management, but it shouldn’t be. Tags and clients process real data, trigger real conversions, and directly affect business decisions and ad spend. A bug in your client template isn’t just a code issue — it’s a data quality issue. And bad data can silently corrupt everything downstream.
The mocking approach we’ve covered here is not a workaround — it’s the correct way to write isolated, repeatable and reliable unit tests. Once you start writing them, you’ll quickly realise how many edge cases you’d otherwise miss. Investing in unit tests early saves you from painful debugging sessions in production later.
To put it simply: if your code is worth writing, it’s worth testing.